First what you need is a couple of small blocks of FIMO brand clay, which you can obtain at any Hobby or Craft store. You also need something to carve the shape of the rune into the clay before you bake it. Feasibly you could use a nail, or something that would neatly carve the rune-shape. I bought a craft tool for it with a pointy end, it was probably about 99 cents (American cents), and the FIMO was probably around a dollar fifty. Fimo comes in many colors, and you will also need some craft-paint to paint the rune after you have baked the clay. The color of the clay should go nicely with the paint, of course. I made a beautiful silver and blue set (silver metallic fimo and a deep blue paint, it reminds me of Odin's dark blue cloak with silver stars in it, but the colors are reversed.) and also a gold metallic fimo with brick red paint that turned out lovely. You also need a cookie sheet to bake them on, and I also recommend using waxed paper, not that they will stick, but you never know, and you don't want to ruin your runes!
Now, after you have what you need, you basically rip off small chunks of fimo and roll them into little balls. You can do this with one small brick of fimo, and the runes, when the little balls of clay are flattened, should be about the circumference of your thumb. Don't make them too flat, because you still need to be able to carve the rune into them without 'going all the way through' the clay! After you have carved the runes into the clay (all 24 runes, I don't use a blank one.. that's just silly) follow the directions on the FIMO package to bake them. It doesn't take long for them to harden. Once they are done, take them out and you'll find they aren't very hot but I do still recommend caution, the longer you hold them, the hotter they are, so it's best to give them several moments to cool, at least maybe five minutes. When they have cooled, you can paint them. You may choose to lend a few drops of your own blood to the paint, with a sterilized utensil of course. You can sterilize it by either wiping it with rubbing alcohol and letting it air-dry, or use a lighter or match to heat the tip you are using to prick your finger for at least ten seconds.. LET IT COOL before you prick your finger, or if you have any sterile lancets, what diabetics use to prick their fingers to test their sugar levels, you can use that. I don't condone stealing from a diabetic, or anyone for that matter, you can always ask them for one. If you don't think the needle is sterile, then don't use it, unless you can sterilize it yourself, if you can't, then don't use it! It's not essential for making a rune-set, but many do prefer adding a couple of drops of blood to the stain, or paint in this case. If you are doing this, then you add just a couple of drops to the paint, and stir it with a toothpick or something similar. Many believe it adds personal power to your runes, and also 'feeds' them. However it is just a personal preference, and not 100% necessary, by any means, and I have found the runes seem to be just as accurate without blood.
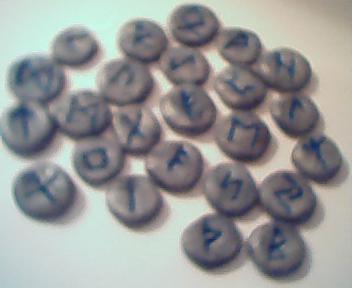
Carefully paint the grooves you made to engrave the rune symbols, let them dry, and there you have it!
Recommended reading:
Taking Up The Runes, by Diana Paxson
Futhark by Edred Thorson
You *may* also like to read: "Leaves Of Yggdrasil" by Freya Aswynn, or by its new title: "Northern Mysteries and Magick"